SECTION 27: FIREWALL
Jump to navigation
Jump to search
Build Instruction Updates
- N/A
Check for more recent updates here
Videos
PAGE 27-2
- For additional info on the firewall in general, see also section QB_Fuselage
- Plan your control cables pass-throughs at step 3
- Some people have used an "eyeball" type here that may require different spacing than the pre-punched holes provided in the kit.
Many use these for the control cable penetrations (at Spruce: EYEBALL FIREWALL FITTING- SS PRESSURE PLATE - STEEL TTP):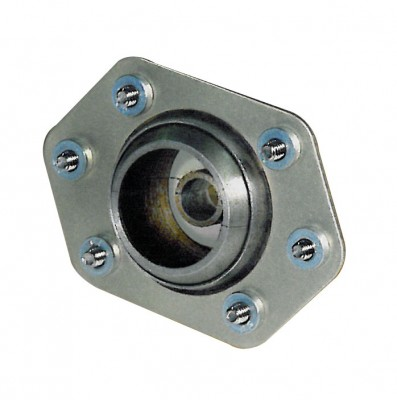
More products are here: https://www.firewallfittings.com/product/ttp-s/
You may need to order custom diameter pass-throughs here, for example, the California "176-VTT"-type Push Pull cables have an OD of .34, so a custom OD of .345 may be appropriate. You can also order double hole ones here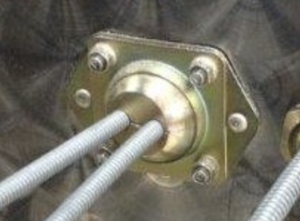 .
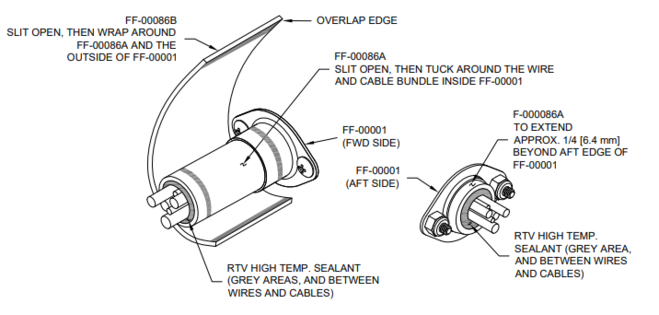
. - Look ahead in the plans to see if you want to do the double plastic bushing. The RV-14 kit uses an FF-00001 to penetrate the firewall:
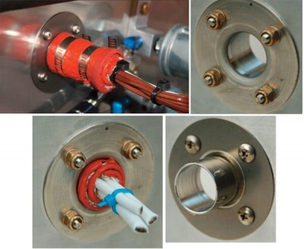
- Many people have used the following pass-thru with the RV-10 (at Spruce: Avery SS Firewall Pass-Thru):
- If you plan to install electronic injection (SDS or EFII) or a fuel purge valve, mirror the 9/16 hole over to the left side as you will need two.


Step 4
- Several builders are reporting that part WD-1002-L-PC / WD-1002-R-PC is being labelled incorrectly. If you ended up with two of the same kind, Vans will be happy to swap them out.
Step 7
- Note when riveting F-1001M Left Side Angle, you need to leave the 2 holes that intersect the Oil Cooler Box Attach Holes open so that they can be used to attach the oil cooler in Section FF1-2
PAGE 27-3
- Part F-1051J Scat Tube Support is installed on Page 50-2, Step 1.
PAGE 27-4
- Step 1: In order to nest the aluminum and steel parts and make the holes align, it's necessary to file F-1001E-L/R as indicated in figure 1.
- Step 1: The WD-1004 nose gear tension fitting is the same part for left and right. The tooling hole will be on the upper rib on the left and the lower rib on the right side.
- Step 6: The manual doesn't spell out that you need to dimple the screw holes of the K1100-08 nutplates. See page 26-2, step 5 as reference.
- Step 8: If you are planning to use the Andair fuel selector you might want to hold off riveting the F-1048C-1 Fuel Valve Bracket to the fwd fuselage ribs, as the Andair selector does not fit this bracket.