QB Fuselage
Jump to navigation
Jump to search
Tools
- #36 drill bit to drill out 1/8 pop rivets at Amazon
- Punch for #36 holes, e.g. one from punch set at Northern Tool or use the end of a #36 drill.
- Wedges to get floor panels past ledges at Amazon
- Rivet set with hole (to hold male dimple die) at Cleaveland
- Special bucking bar to rivet F-1023-L and -R at Cleaveland (part of RV-10 tool kit)
Links to Builder Logs / Discussions
Additional Comments
- In the above linked threads, references to "Page 28-16: Both sets of F-1057 L/R Mid-Seat Rail Supports" are outdated as newer fuselages no longer have this part. That page number is now blank on newer instructions.
- "Page 27-2: If going with a Lycoming engine, the three holes in the recess need to be widened to 5/8 inch with a Unibit". If you plan to use spherical firewall fittings for the cables, be aware that the pilot holes won't provide enough distance for those. If you have an engine with electronic injection, you don't need the rightmost hole as there is no mixture. If you are installing air conditioning, the prop cable will run on top of the engine, instead of through the center hole in the recess. Closing unused pilot holes: dimple (male dimple die goes in rivet gun, see tools above; on backside, use self made bucking bar with machine countersunk 3/32 hole) and close with 3/32 rivet.
- Page 29-9, step 5: Both longerons were too long (the left one will interfere with the vertical post of the baggage door, the right one will interfere with tailcone bulkhead). Mark the correct length from the last rivet, jam a piece of robust steel sheet metal between the longeron and the skin and cut the longeron with a dremel "thin cut" metal disk.
- The baggage door bottom shims were primed and came as loose parts with the kit. They aren't match drilled yet and they aren't dimpled.
- The baggage compartment floor support angles along the skin (F-1023-L and -R) need to be riveted before attaching the tailcone. Use the specially shaped, very long bucking bar with the slanted end to buck the rivets. There is no other way to get back in there.
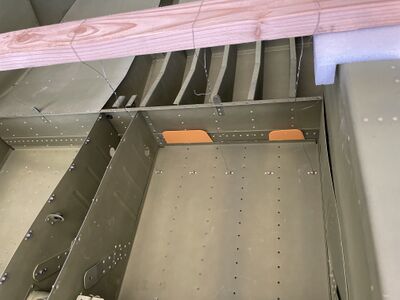
- It is not really necessary to take the front floor panels out. Most people don't. However, foreign objects have been found trapped underneath (rivet, sandpaper), also sticky areas that will accumulate dust. To take the front floors out, you need to shoehorn the outside edge to get past the side structure and you need to hold the inner back corner down firmly to maximize the distance to the side structure. Be careful not to kink the aft flange (better to slightly bend the center section of it backwards so it allows bending).
- So far confirmed on one QB delivered in Feb 2022 (Built in Sept 2021), QB fuses may have a primer that comes off when rubbing surfaces with ethyl alcohol wipes.
- If the primer comes off with just a dry cloth, you have a QB that has been manufactured in a period where priming was done wrong at the factory. Contact Vans about your options.
- Don't try to sit up front with the QB fuselage just sitting on the cradle. It will tip forward when stepping into the front footwell. You need to weigh down or strap down the QB fuselage at the steps for doing that.
- Check the holes / dimples on the rear flange of the F-1022A luggage floors. The two most inner nutplates are one-sided (MS21051-L08 instead of K1000-08). The QB might assume normal nutplates all along that edge. The nutplates need to be one-sided as only then the holes in the F-1006F bulkhead close-out and the F1051F tunnel cover will align with the nutplate's threaded hole.
