SECTION 7: RUDDER
Build Instruction Updates
- 11/06/20 07_10.pdf
Check for more recent updates here
Builder Videos
Plane Lady:
- 7-2,7-3,7-4
- 7-4,7-5,7-6
- Rudder skins
- Rudder mistake
- 7-6,7-7
- 7-8,7-9
- 7-10
- 7-10,7-11
- rolling leading edge
- 7-11, 7-12
Jason Ellis:
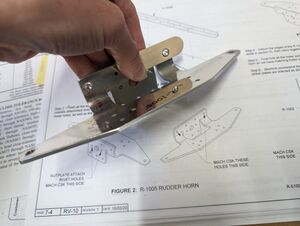
Page 7-4 Step 2
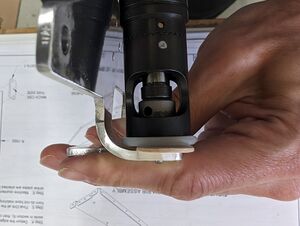
If your microstop (countersink) cage interferes with the radius of the R-1005 Rudder Horn on the 2nd set of countersink holes, one solution is to use a shim between the microstop cage and the part. I used a stepped drill bit (unibit) to put a 5/16" hole in a large popsicle stick that measured .060" thick. If you set the perfect depth of the microstop on the previous two holes, then .060" is exactly two full turns clockwise to account for the thickness of the popsicle shim. Don't forget to reset the depth of the cage afterwards!


Page 7-6 Step 11
"The holes" refers to the holes in the skin that are common to the rudder skeleton as defined in step 6. The bottom row of holes where the fairing attaches is not touched in this section, rather in section 12, page 12-3, steps 2 and 3.
Page 7-7 Step 1
Step 1 instructs the builder to rivet together R-1004A&B Bottom Rib halves. This results in difficulty in riveting the R-1004 Bottom Rib Assembly to the R-1001-R Skin as instructed in Step 3 on Page 7-8. This is because of inability to get a rivet squeezer into the triangular converging tip between R-1004A and R-1004B (see figure below). Recommend delaying 7-7 Step 1 until after 7-8 Step 3. In doing so, there will be ample room to utilize a rivet squeezer. Otherwise, insert a chisel on top of the rivet and buck the chisel face to set the rivet.

Page 7-7 Step 5
This may be your first time back-riveting. You don't need to cleko these in place. The quickest method is to insert all of the rivets for the ribs, then cover with rivet tape. Then flip it over and add a rib, back-rivet, then add the next rib, etc. Be very careful that you confirm the back-rivet plate, though. Some of the longer ribs may be longer than your back-rivet plate.
Page 7-7 Step 12
You can buy a pre-made jig for easily countersinking the trailing edge: https://cleavelandtool.com/products/countersink-jig-for-rv-trailing-edge-wedge
Page 7-9
- Consider using a metal angle / square steel tube with matched holes to get a straight rudder trailing edge during assembly.
- Consider using MDF boards instead, see this FB thread.
- This may be your first time using sealant -- I suggest buying the larger 2-can kit from Van's and storing in your refrigerator. You'll need to use a lot of it in the future and it will store for a long time. I mix with a popsicle stick and then I use it to spread on the trailing edge like a spatula. I run the popsicle stick sideways to remove excess.
Page 7-11 Step 1
For better appearance, I recommend alternating the direction of each rivet on the trailing edge. I also recommend using a squeezer with a special die set made for this: https://cleavelandtool.com/products/flat-squeezer-sets
Page 7-11 Step 2
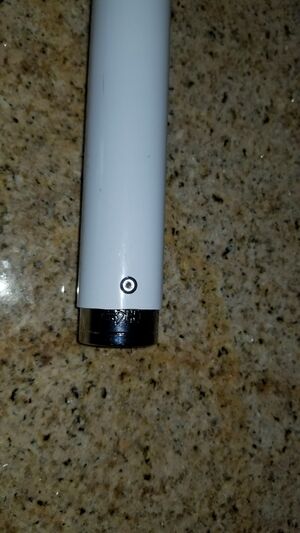
There are many ways to roll the leading edge. One possible solution is to get a white powder coated steel closet rod at home depot, then go to the tools section and find a socket that fits snuggly into it. Drill two or three 1/8th holes through the rod and socket (with a tungsten carbide drill bit) and pop rivet the rod to the socket. Using a socket wrench with a universal joint, you can easily exert plenty of rolling force into the rod. Tape the skin to the rod using heavy duty duct tape.
I used the pipe method as described in the instructions using lots of painter's tape to attach it to the skin. But I had to start with a l-1/4" outer diameter and then switch to a smaller diameter pipe to finish the job. You have to roll it much further than 90 degrees to get it to sit at more or less 90 degrees. Also, when you roll, make sure you don't crease the skin along the front spar. I lay the rudder with the skin against the table and then I press down against the table while I roll. I used vice grips on the end of the PVC pipe to apply more torque to the rotation.
Page 7-11 Step 6
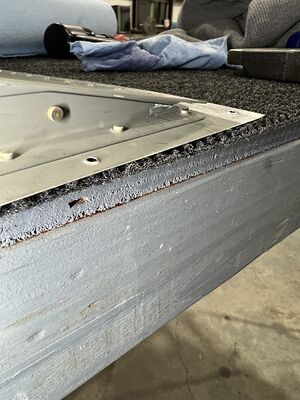
I recommend using a piece of wood on the outside to simply press against the skin to bend it until it gets fairly flush. Then you can hammer against that outside piece of wood to make it even flatter. Finally, you can use your rivet gun with the flat mushroom set on VERY LOW power to make the seam nice and defined. Absolutely make sure you have wood (not metal) on the back side of the skin (just as specified in the instructions).
