SECTION 32: TAILCONE ATTACHMENT
Jump to navigation
Jump to search
Build Instruction Updates
- N/A
Check for more recent updates here
Builder Videos
- Jason Ellis
- Rodrigo Damazio Bovendorp
Discussions
Page 32-3
- Stack at the corners from inside to outside
- tailcone bottom skin
- tailcone side skin
- fuselage bottom skin
- fuselage side skin
- Stack at floor joint from bottom to top:
- fuse skin (F-1077)
- tailcone skin (F-1078)
- bulkhead (F-1006B)
- rib tabs (e.g. F-1019-R)
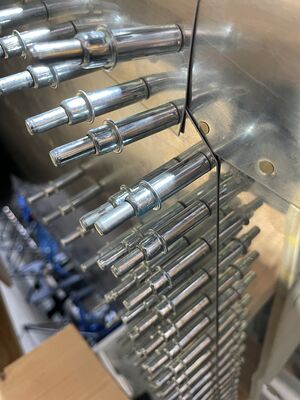
- Consider using plastic wedges to guide the tailcone bottom skin to go above (inside) the fuselage bottom skin, e.g. at Amazon
- Consider using two thin strips of aluminum (3/4 inch wide) in the bottom corner sections to guide the tabs of the tailcone to go inside the fuselage skin.
- Consider using an inflated 20 inch truck inner tube underneath the fuselage center to lift the fuselage slightly, allowing a swivel motion within the fuselage cradle constraints e.g. at Amazon
- This is going to be the first section where you will be happy to have a creeper to get underneath the fuselage, e.g. this one at HF.
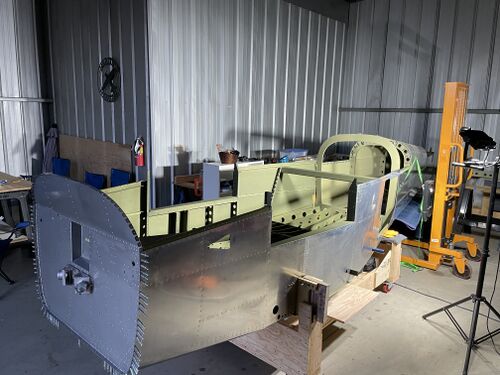
- Throughout the build, a "pallet stacker" / manual forklift comes in handy. Shown here to raise the tailcone to be level with the fuselage. They ran around $1,000 new on ebay in 2020 but keep their value and allow you to unload the kits from the truck which makes the delivery non-residential thus saving money each time. They can also act as an engine hoist as you can lift the fork 6 feet and hang the engine from a fork. When not in use, they make an adjustable work bench. Might also come in handy when fitting the fiberglass cabin top.
Page 32-4
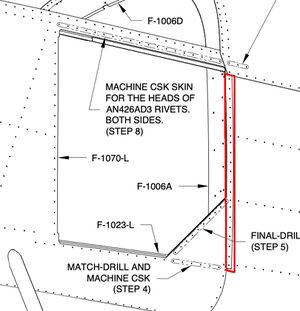
- When to dimple the holes marked in red? Answer: Page 32-5, step 3: Dimple all skins common to the F-1006 A, B & D bulkheads. In this case, it is the F-1006A bulkhead. This is also true for the corner hole of the tailcone side skin. Uncleco the longeron to pull the skin forward during dimpling. One needs to pull up the longeron a bit to countersink the underlying hole in the longeron. Helps to take the cake off the countersink step tool.
- When dimpling the aft most holes of the fuselage ribs, one needs to put one or two dimpled shims in when dimpling the stack.
- Countersinking the side skins: The three holes on the left side skin located rear of the baggage door top (and same three on the right side) need to be flush plus 7 clicks to accommodate a dimpled skin on top of them (you just removed the top skin F-1074 which covered them), however the horizontal line of holes above the baggage door and the corresponding ones on the right side, also the six holes on the bottom right of the baggage door, need to be countersunk just flush since nothing goes on top of them.
Page 32-5
- If you plan to install the BRS parachute, match drill and attach / rivet the rear attachment external plate at this stage to the bottom of the tailcone. Some of the rivets are common.
- Step 6 refers to "Page 33-4, Figure 3", correct is "Page 32-4, Figure 3". Also, debur the 6 holes before dimpling as they were recently match drilled.
- Step 18, installing two SB625-7 snap bushings: those shipped with the empennage kit, not part of the fuselage kit / fuselage QB kit.
Don't install any of the snap bushings yet that carry the rudder cable. You cannot get the rudder cable end fitting through the snap bushings if they are mounted as they need to be squeezed oval to let them through. Install the snap bushings along with the rudder cable install instructions on page 38-8. - Once you are done with the tailcone attach, add two AN960-8 washers and AN515-8R8 screws to the frontmost two holes of the F-1035 battery mount. The nutplates are now installed. The build instructions don't cover those two holes. Note: You will later temporarily remove the entire F-1035 battery mount to thread in both forward elevator push rods.


