SECTION 43: CABIN COVER: Difference between revisions
Jump to navigation
Jump to search
m (→Posts) |
m (→Videos) |
||
| Line 20: | Line 20: | ||
** [https://www.youtube.com/watch?v=8YYSrE1i8X0 Cabin Cover 9] | ** [https://www.youtube.com/watch?v=8YYSrE1i8X0 Cabin Cover 9] | ||
** [https://www.youtube.com/watch?v=YRN7ohC4B6w Cabin Cover 10] | ** [https://www.youtube.com/watch?v=YRN7ohC4B6w Cabin Cover 10] | ||
** [https://www.youtube.com/watch?v=1lsYAIfMHDM Cabin Cover 11] | |||
==== Page 43-3 ==== | ==== Page 43-3 ==== | ||
* Step 1: The cover's scribe lines for where it needs to mate with the door opening of the fuselage are too far apart. The door opening is only 37 inches but the scribe lines yield a 37 7/16 wide cover. See this [https://vansairforce.net/community/showthread.php?t=206804 VAF thread] for details. | * Step 1: The cover's scribe lines for where it needs to mate with the door opening of the fuselage are too far apart. The door opening is only 37 inches but the scribe lines yield a 37 7/16 wide cover. See this [https://vansairforce.net/community/showthread.php?t=206804 VAF thread] for details. | ||
Revision as of 00:38, 21 July 2023
Build Instruction Updates
- N/A
Check for more recent updates here
Posts
- FB 7/23
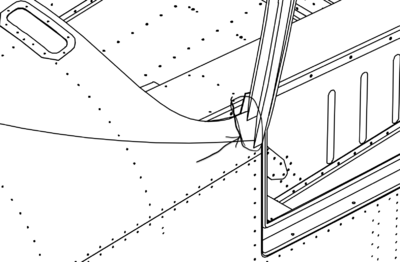
- (D. Peterson) This is time consuming, but it isn't rocket science. It is an expensive part & you don't want to mess it up, but be methodical & patient and it will be fine. We started with Dremels with Permagrit cutoff disks and also a Dewalt oscillating tool with a "fast wood" blade which worked surprisingly well (get a couple extra blades). I tried a jigsaw, but the blades I had dulled super fast. The 40 grit paper on a belt sander worked very well for the closer work and getting the bottom and sides of the door thin enough. We traced the scribe line with a fine tip sharpie and rough cut to that, then worked our way down until it fit. We probably put it on and off the airplane 15-20 times, which is a bit of a pain, but not bad in the big scheme of things. I now understand what people mean when they say it gets "razor thin"; the edges get very sharp as you get close to the end. Use caution! One thing we did wrong at first was trying fit the aft edge of the Upper Fwd Fuse OUTSIDE the cabin top. It doesn't work well that way. The skin goes INSIDE the cabin top. Seems obvious now. See pic. One thing we did toward the end of the door bottom was get a micrometer out and get average current readings, subtract 0.0625 (our goal of thinning for that round) so we had a goal to trim to. If you do this, mark your micrometer so you are sticking it "into" the cabin edge the same amount (the fiberglass tapers, so the depth of material into the throat of the micrometer affects your measurement). Before it got too thin we were drawing thin permanent marker lines to trim to. I second breathing protection, safety glasses, and hearing protection at least. We also used the air hose to blow ourselves off numerous times. Good luck. It took two of us about a day and a half. It wasn't as bad as I expected.

Videos
- Craig's video
- Rodrigo Damazio Bovendorp' videos
Page 43-3
- Step 1: The cover's scribe lines for where it needs to mate with the door opening of the fuselage are too far apart. The door opening is only 37 inches but the scribe lines yield a 37 7/16 wide cover. See this VAF thread for details.